Monday, October 8, 2012

Mason Sewing Jar

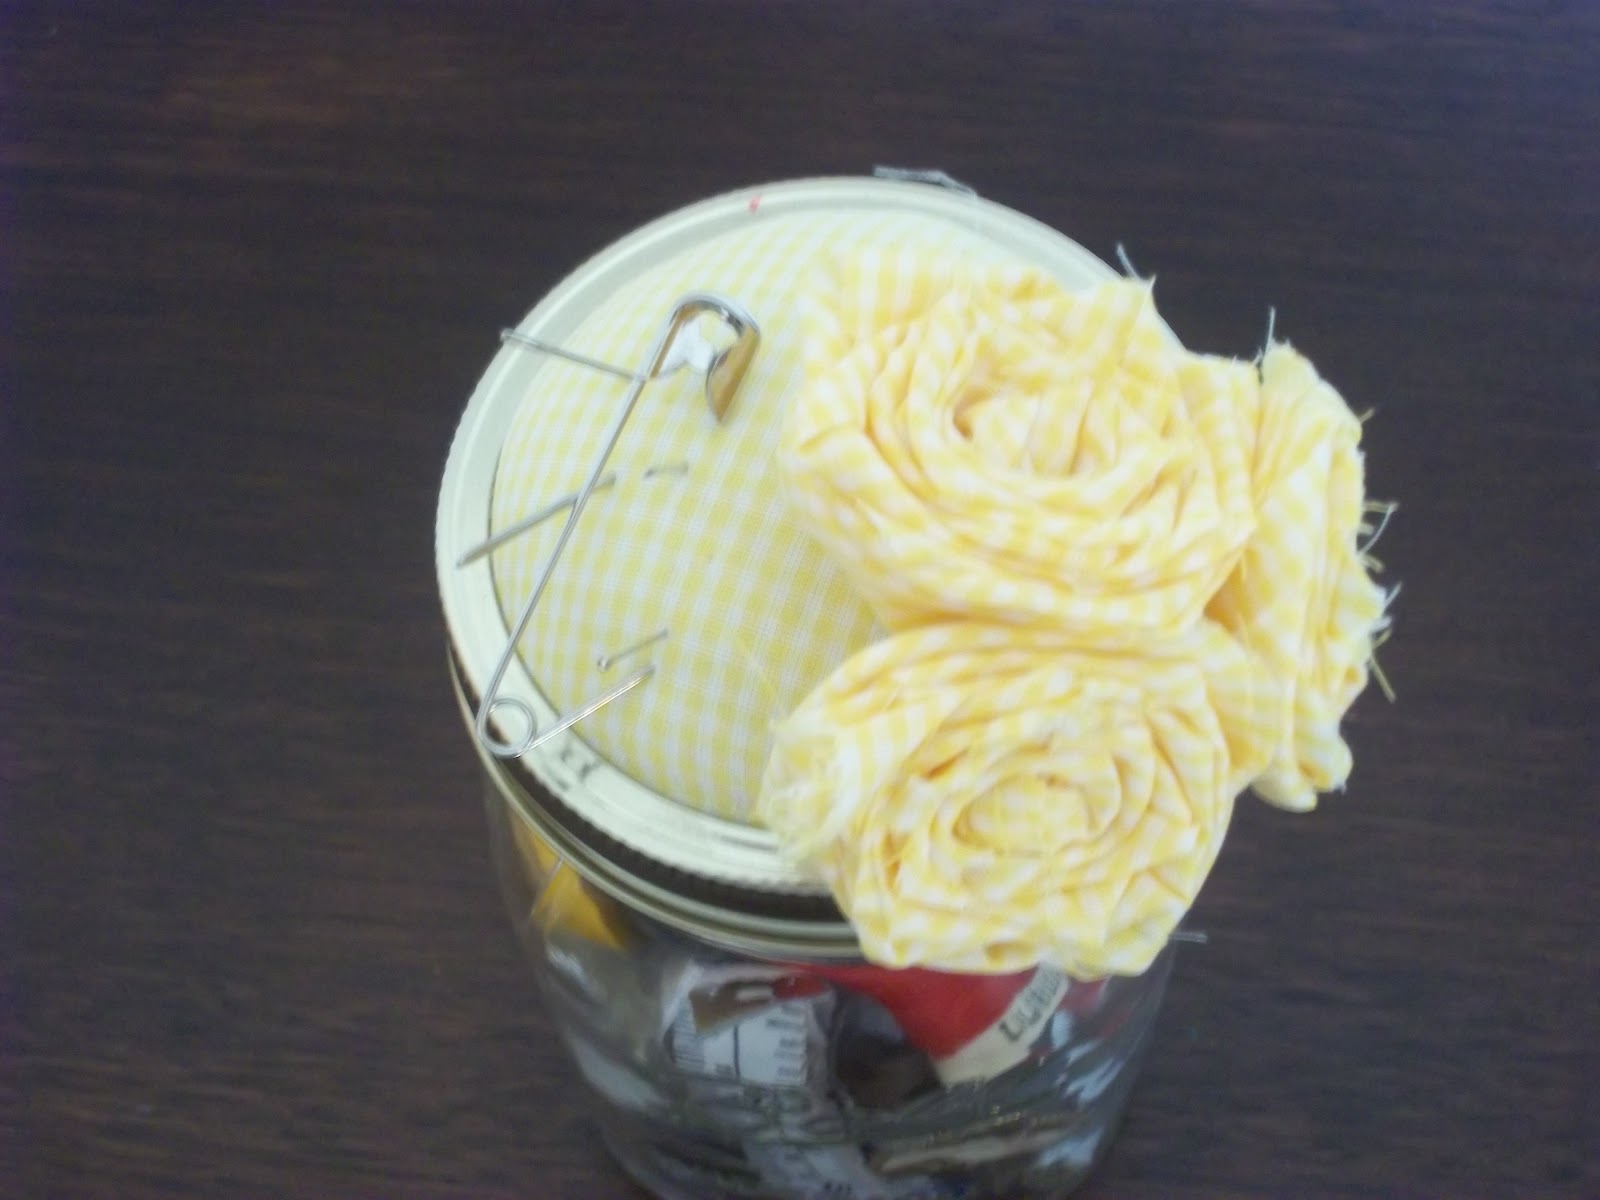
Mason Jar Sewing Kit
My lovely Parents bought me a sewing machine and sewing lessons for my birthday! What a great gift to receive and I am so excited to become a little sewing machine:) I decided to use a Mason jar that was my Grandmother's to create a small sewing kit.  My pin cushion top sewing kit was simple to make and is the perfect size to store all of my sewing essentials.  My sewing treasure reminds me of my Grandmother each time I see it pleasantly sitting next to my sewing machine.  My Grandma Ma would be so happy to see that I am putting one of her canning jars to good use!

I didn't take any photos while I was making the jar so I will try my best to describe the steps.

Supplies:
  • Mason jar with lid
  • Fabric glue
  • Hot glue
  • Fabric (I used about a quarter of a yard)
  • Cotton Batting
  • Thin cardboard or card stock
  • Scissors
  • Pencil
First, I took the flat metal lid from the rim and used my pencil to trace it onto the cardboard.  Next,  I traced another circle onto my fabric approximately 1 to 1.5 inches larger in diameter than the lid.  I used my scissors to cut out both circles.  Then I took a small handful of batting and I glued it onto the cardboard circle and placed the fabric circle on top, smoothing out the fabric over the batting. Then I applied hot glue to the back of the cardboard piece to secure the edges of the fabric. 

Next, I turned the metal rim upside down and I applied hot glue to the inside of the rim. Quickly I placed the fabric and batting cushion into the center of the rim, making sure it was protruding evenly through the hole and that the cardboard was flush against the inside.  Finally, I used hot glue to attach the flat lid to the cardboard. 

Once the pin cushion lid was complete, I used the remaining fabric to create a few fabric flowers (see my Fabric Flower Tutorial for details).  I used fabric glue to secure the flowers on the top,  adding a charming touch to the pin cushion. 

Pin Cushion Top
Sewing Essentials:
  • Measuring tape
  • Sewing needles
  • All-purpose thread
  • Thimble
  • Extra buttons
  • Safety pins
  • Straight pins  
  • Seam ripper
Mason Jar Sewing Kit

Lauren


Wednesday, September 19, 2012

Apples, Apples, Apples!

Apple Lacing 
Back to school! I decided that as the school year goes on I am going to post some of the treatment activities that I do with my little ones at school.  Lacing is one of my favorite activities to do with my O.T. students!  Lacing is an activity that promotes the development of many fine motor and visual motor skills needed to perform functional tasks; such as bilateral coordination, hand-eye coordination, grip strength, finger dexterity, spatial awareness, sequencing steps, and accuracy.  I will try to post pictures of my lacing activities with templates as the school year progresses.  My student's are definitely more eager to practice lacing when they know they are creating something fun! Back-to-school apples, Halloween pumpkins, Thanksgiving turkeys, Valentine's hearts, Winter Wonderland penguins, lucky shamrocks, and Easter eggs are a few of my lacing ideas so far:)  

Apple lacing and cutting activity
Supplies:
  • Apple, stem and leaf template
  • construction paper (red, green, brown) 
  • yarn
  • hole punch
  • newspaper or tissue paper
  • tape
  • glue stick

Apple, stem and leaf template
I am having difficulty in uploading the apple, stem and leaf template I created so I posted it as a picture to give a better idea of the patterns I traced to create the pieces.  I will be sure to update this post as soon as I figure it out... so stay tuned!

Preparation: My best practice is to prepare for all of my treatment themes ahead of time and I usually prep a few extra just in case of any mix-ups.  I am usually tracing, cutting and laminating in front of my favorite television shows.  For my lacing projects, each student's gets two templates identically hole punched and tied together through one of the holes with a piece of yarn long enough to lace in a front-to-back pattern along the template.  For example, if you are preparing this activity for 20 students, you will need 40 paper apples and 20 pieces of yarn cut to fit.

After the apples are cut, hole punched and tied, add a small piece of tape to the end of each yarn piece so it will be easier to manage and to thread through the holes.  Then cut an apple stem and leaf for each apple using the brown and green construction paper.  I try to incorporate cutting practice into most treatment activities so for this project I decided to cut the apple stems and then trace the leaf shape on to small green squares for the students to cut out themselves. I also used the school dye cut machine to cut out small upper case letters so the students could work on sequencing their first names on to their apples.  

Name Sequencing
Intervention: The students begin by lacing their apples.  It is important that the student's focus on lacing each hole, sequencing one-at-a-time in a clockwise (or counter clockwise) pattern and remembering to pull the string fully through each hole so there is enough yarn to lace the whole pattern.  I usually cue my students to continue lacing along the pattern until there are only about 3 open holes toward the top.  Then give each student a piece of newspaper to tear into small pieces, crumble and stuff into the apple.  I love this part of the activity because it really targets bilateral coordination and motor planning skills and the kids really love tearing the paper and stuffing the apple to look delicious and juicy!   After stuffing the apple, lace the remaining holes, secure with a knot or bow and trim away excess yarn.  Have the students use scissors to cut out the leaf and stem shapes and use a glue stick to glue the stem and then leaf on top; working on spatial awareness and sequencing.  "The stem goes at the top, the stem goes at the top, hi ho did you know, the stem goes at the top..."
Apple Lacing


Red Delicious Apples! 

A few of my favorite apple songs:
: 
One Little, Two Little, Three Little Apples!
(sing to the tune 'One Little, Two Little, Three Little Indians') 

One little, two little, three little apples!
Four little, five little, six little apples! 
Seven little, eight little, nine little apples!
Ten little apples growing on the tree!


Apples, apples, apples!

Apples, Apples, Apples
Apples on a tree
 Apples, apples, apples
Red, yellow, green!

Apples, apples, apples
grow so way up high
Apples, apples, apples
we bake them in a pie!

Apples, apples, apples
taste so good to me
Apples, apples, apples
good for you and me!  

APPLE Song
(sing to the tune 'BINGO')

There is a fruit that grows on trees
and apple is its' name-o!
A-P-P-L-E
A-P-P-L-E
A-P-P-L-E
and apple is its' name-o!

It is a fruit that good to eat
and apple is its' name-o!
A-P-P-L-E
A-P-P-L-E

A-P-P-L-E
and apple is its' name-o!

It can be sweet, it can be tart
and apple is its' name-o!
A-P-P-L-E
A-P-P-L-E

A-P-P-L-E
and apple is its' name-o!

Ten Red Apples 
Ten red apples grow on a tree
Five for you, and five for me
Let us shake the tree just so
and all ten apples will fall below!
1,2,3,4,5,6,7,8,9,10!

Apple Matching from www.filefolderfun.com
Since my area of practice is school-based, specifically early childhood, I also try to incorporate alot of therapeutic activities that focus on visual-motor integration skills into my treatment sessions.  Matching games are a great way to work on not only visual-motor skills but also hand-eye coordination, visual-scanning and discrimination skills and fine motor control.  I have created many matching games to tie into alot of my intervention plans.  There are alot of great resources on the web that offer many printables according to theme and grade level.  All you need to do is  print (remember to print two copies; one for the matching board and one to match on top), laminate, cut and Velcro and you have an instant matching game.  Depending on the skill level, you can printables focusing on matching according to color, shape, pattern or theme.  Matching boards are definitely a student favorite!

Here are a few of my favorite resources:

Apple Paintings
For my younger Pre-Kindergarten and severe and profound students, alot of treatment interventions focus on sensorimotor and sensory processing therapeutic activities.  I love to plan activities that focus on motor planning, tactile exploration and functional use of art supplies.  Painting and pasting activities are perfect for incorporating these skills.  It is important for these little ones to learning how to functionally engage within their learning environment and simple painting activities focus on learning functional use art supplies (using the paint and brush effectively) and sequencing steps (dipping the brush into the paint and apply the paint while targeting within large boundaries).  For this apple activity, I cut out large apple shapes from white construction paper and had the students paint them bright red using a mixture of tempera paint and shaving cream.  I find it helpful to add a few drops of dish soap to the paint mixture for easy clean-up and to minimize stains.  As you can see for the picture above, my students are little Pablo Picasso's:)  To add to the experience, I purchased apple scented products and apple sauce so the children could explore and experience apples using their other senses (olfactory and tactile). 
Apple Picking Race
Apples have definitely been the theme for O.T. throughout the first few weeks of school.  By the end of the theme, I am usually dreaming and singing of red, yellow and green apples:) Being resourceful, I used some green and brown felt material I found amongst my O.T. supplies and I cut out two large green circles and two large brown rectangles to create trees.  I clipped the trees onto my movable easel stand (one on each side) and used Velcro dots to attach red and green balls to create an apple trees.  My students loved participating in apple picking race.  The student's had to pick the apples at midline and sort according to color into barrels.  Not only does this activity focus on motor planning, hand-eye coordination, sequencing, spatial awareness, visual discrimination skills but it also incorporates turn taking, team work, endurance and crossing midline.  After sorting and counting their apples, the student's then had to tally on the board the number of red and green apples they picked.  This is a fun warm-up activity and can be modified depending on skill level and physical abilities.  For my higher functioning students needing to work on balance and body awareness, I have them stand on a balance board or disc.
Apple Matching
Modification: Since I have students functioning at different developmental and skill levels I decided to adapt the apple picking race to make it a little more challenging.  I created a large tree similar to the felt tree using bulletin board paper (I laminated it so I can use it again next school year).  I used Velcro dots to attach the apples from the apple matching boards I made and I hung the tree on a tall movable cart.  This type of activity is great for working on visual scanning skills, hand-eye coordination and motor planning.  Picking the apples from the tree and then matching the apples on the board was not only fun for the kids but a purposeful activity. 

Darling apples have beautified our therapy gym! What a tasty way to Fall back into school!
Apples!

Lauren

Tuesday, September 18, 2012

Fabric Flower Wreath

Welcome to September! It has been a few weeks since I have posted but I have been working like crazy to prepare for the new school year and hopefully I will find the time to post some of the crafty projects that I have been working on soon!

Fabric Flower Wreath for Fall
Since I had so much practice this Summer making the rolled fabric flowers, I decided to make a wreath (one of my favorite gifts) for my parent's front door to welcome Fall! I tried to choose fabrics that coordinated using Earth tones (cream, gold, green, blue and red colors).  There are always so many choices of fabrics and I didn't want the wreath to look too busy so I narrowed my fabric choices to five different patterns.  Remember, the pattern of the fabric isn't as important as the colors.  I usually look for larger print patterns so the pattern won't really matter once the flowers are rolled.  I was able to find all of the materials used at Joann Fabrics .  Joann has a great selection of fabrics and floral accents and usually runs great sale prices and offers a pretty sweet discount for educators:)

Supplies:
Supplies
  • Fabric (I used 5 different patterns, 1/2 yard of each to make approximately 40 fabric flowers) 
  • Fabric glue 
  • Scissors or rotary cutter 
  • Ruler or rotary cutting mat with ruler
  • 16 inch grape vine wreath
  • Glue gun and glue sticks
  • Wooden letter and berry stems (optional) 
  • Acrylic paint and brush (optional)
Step One: Follow my Fabric Flower Tutorial for step-by-step instructions on making the rolled fabric flowers.  Side Note: In all of my practice making these flowers I discovered that instead starting the flower by tightly rolling the fabric 7 to 8 times (as seen in step two) it is much easier to tie a knot at the end of the fabric strip to create the center of the flower and then begin twisting the fabric.  (Please see example below)  I suggest trying both techniques and deciding for yourself which way works best and which flower style you prefer.  I decided I wanted the wreath to be very full so I rolled approximately 40 flowers using every inch of fabric. 
Rolled fabric flowers using knot technique

Step Two: Once all of the flowers were rolled, I used my hot glue gun to secure the small berry branches around the wreath (sorry I forgot to take a picture of this step).  I used five stems and tried to space them evenly along the diameter of the wreath.  I was originally planning on using both the large and small berry accents as pictured however after I got started I decided that the small berry stems were just enough.  Worry not, the large berries will not go to waste! I am sure I will find a creative way to use the stems in the near future..I am thinking to decorate a hurricane candle.

Fabric Flowers
Step Three: Once the berries were in place and secure, I used my hot glue gun to attach the flowers by alternating patterns and sizes.  In the meantime, my sister Gwen painted the wooden G a gold color and once it was dry I attached it to the wreath using my hot glue gun.

My Mom was so excited with how fabulous the wreath turned out and I think it is a beautiful addition to their entryway and a simple way to transition into Fall decor!   It would even be pretty hanging in a bathroom or kitchen and the Earthy colors look great with the fresh mums we planted with the potted spikes and vinca vines hearty and surviving from Summer.  Fall is definitely one of my favorite times of the year and I am looking forward to sharing more crafty Fall projects throughout the season!

Lauren

Monday, August 13, 2012

Chocolate Covered Pretzels


Chocolate Covered Pretzels 
Chocolate covered pretzels have become my favorite go-to treat for parties and special events.  These tasty little treats are pretty simple to make and are always a hit! This weekend I co-hosted a baby shower for my friend.  Last minute the party favors we ordered fell through so I was convinced to make some chocolate covered pretzels and package them up as a thank you treat for our guests.  

I like to decorate my pretzels using chocolate and sprinkles to compliment the holiday or theme of the event. I prefer to use Almond Bark in vanilla or chocolate flavors because it is easy to melt, tastes delicious, and sets smoothly. Wilton Candy Melts are also great because they too are easy to melt and the wafers are available in a variety of vibrant colors.  


Chocolate Covered Pretzel Supplies

Supplies:
  • pretzel rods (be careful not to crack the pretzels in transit)
  • almond bark melting chocolate or candy melts
  • sprinkles (sugar or candy) 
  • wax paper
  • microwave safe glass mug or cylinder shape container
  • spoon 
Step One & Step Two 
Step One: Begin by covering your work surface with a few sheets of wax paper.  In the meantime, fill your glass mug with melting chocolate and heat in the microwave on high for approximately 60 seconds, remove and stir.  The chocolate will begin to soften and as you stir it with a spoon it should become creamy.  You may need to pop it back into the microwave for 15 second increments until it is not only creamy but thin but be careful not to over heat! If overheated, the chocolate will become chunky and will not set properly.  

Step Two: Place pretzel rods vertical into the mug and use your spoon to gently work the chocolate up the pretzel.  Once the pretzel is covered with chocolate pull it out of the mug, shake off excess chocolate and place onto the wax paper.  As the pretzels are being covered with chocolate, line them up vertically on the wax paper and shake on the sprinkles or candy pieces before chocolate starts to set.  Make sure to leave the pretzels on the wax paper until the chocolate is fully set and hardened.  


Step Three 

Step Three: Once the chocolate is fully set, I usually melt a small amount of chocolate in a ramekin dish (following heating directions in step one) and I use a spoon to drizzle the chocolate in a sweeping motion across the pretzel rods.  Do not remove the pretzels from the wax paper until the chocolate is fully set (allow about 20 to 30 minutes).  


Step Four: Store the chocolate covered pretzels in an air tight container with a piece of wax paper between the layers of pretzels to prevent them from sticking together.  I usually serve the pretzels on long white porcelain serving plate or arrange the pretzels in a heart or cylinder shape glass vase lined with tissue paper.  


Chocolate Covered Pretzel Favors 
A finishing touch...
Since we were giving the chocolate covered pretzels as a shower favor, we purchased Wilton Pretzel Bags to package them.  We placed two pretzels in each bag and tied a pink tulle bow on top.  The pretzels were delicious and a tasteful way to say thank you to each of our guests:) 
Lauren 

Wednesday, August 1, 2012

Fabric Flower Tutorial

Fabric Flower Headbands

My darling cousins are about to turn 6 and 3 years old and with their birthday party fast approaching I decided to make them both something handmade to add to their gifts.  Rachel and Courtney are very girlie and they rarely leave home without being decked out from head-to-toe! My little dollies are always well accessorized so I decided I would try to make some headbands that would coordinate with their Fall wardrobes:)

I recently learned how to make rolled fabric flowers which are simple to make and can be used to dress-up just about anything! I made an adorable wreath earlier this year using a grape vine wreath and fabric flowers in shades of green (my favorite color). The wreath is packed away in the attic but I will be sure to post a photo when I pull it out in the Spring.  These flowers are also cute glued on ribbons, clips or pins to embellish gifts, clothing, hairdos, etc....these flowers are a crafty gem and the possibilities are endless!  Since I was making the headbands for little ladies I decided to make 3 flowers per headband.

Rolled Fabric Flowers 
Supplies: 
  • Fabric (I used 3 different patterns, 1/4 yard of each to make approximately 18 fabric flowers) 
  • Fabric glue 
  • Scissors or rotary cutter 
  • Ruler or rotary cutting mat with ruler
  • Headbands (I purchased 6 fabric covered headbands but an alternative could be hair clips or pins) 
Supplies 
Step One 
Step One: Cut the fabric pieces into 2" wide by 22" inch long strips.  With these measurements,  I was able to cut approximately 10 strips per 1/4 yard of fabric.  The length of the fabric strip determines the width of the flower, a 22'' strip makes a flower approximately 1" wide (small).  To make a larger flower I usually use 2 to 3 strips.

I used my rotary set to more accurately cut the strips however it's okay to eyeball the measurements if you are using scissors.


Step Two

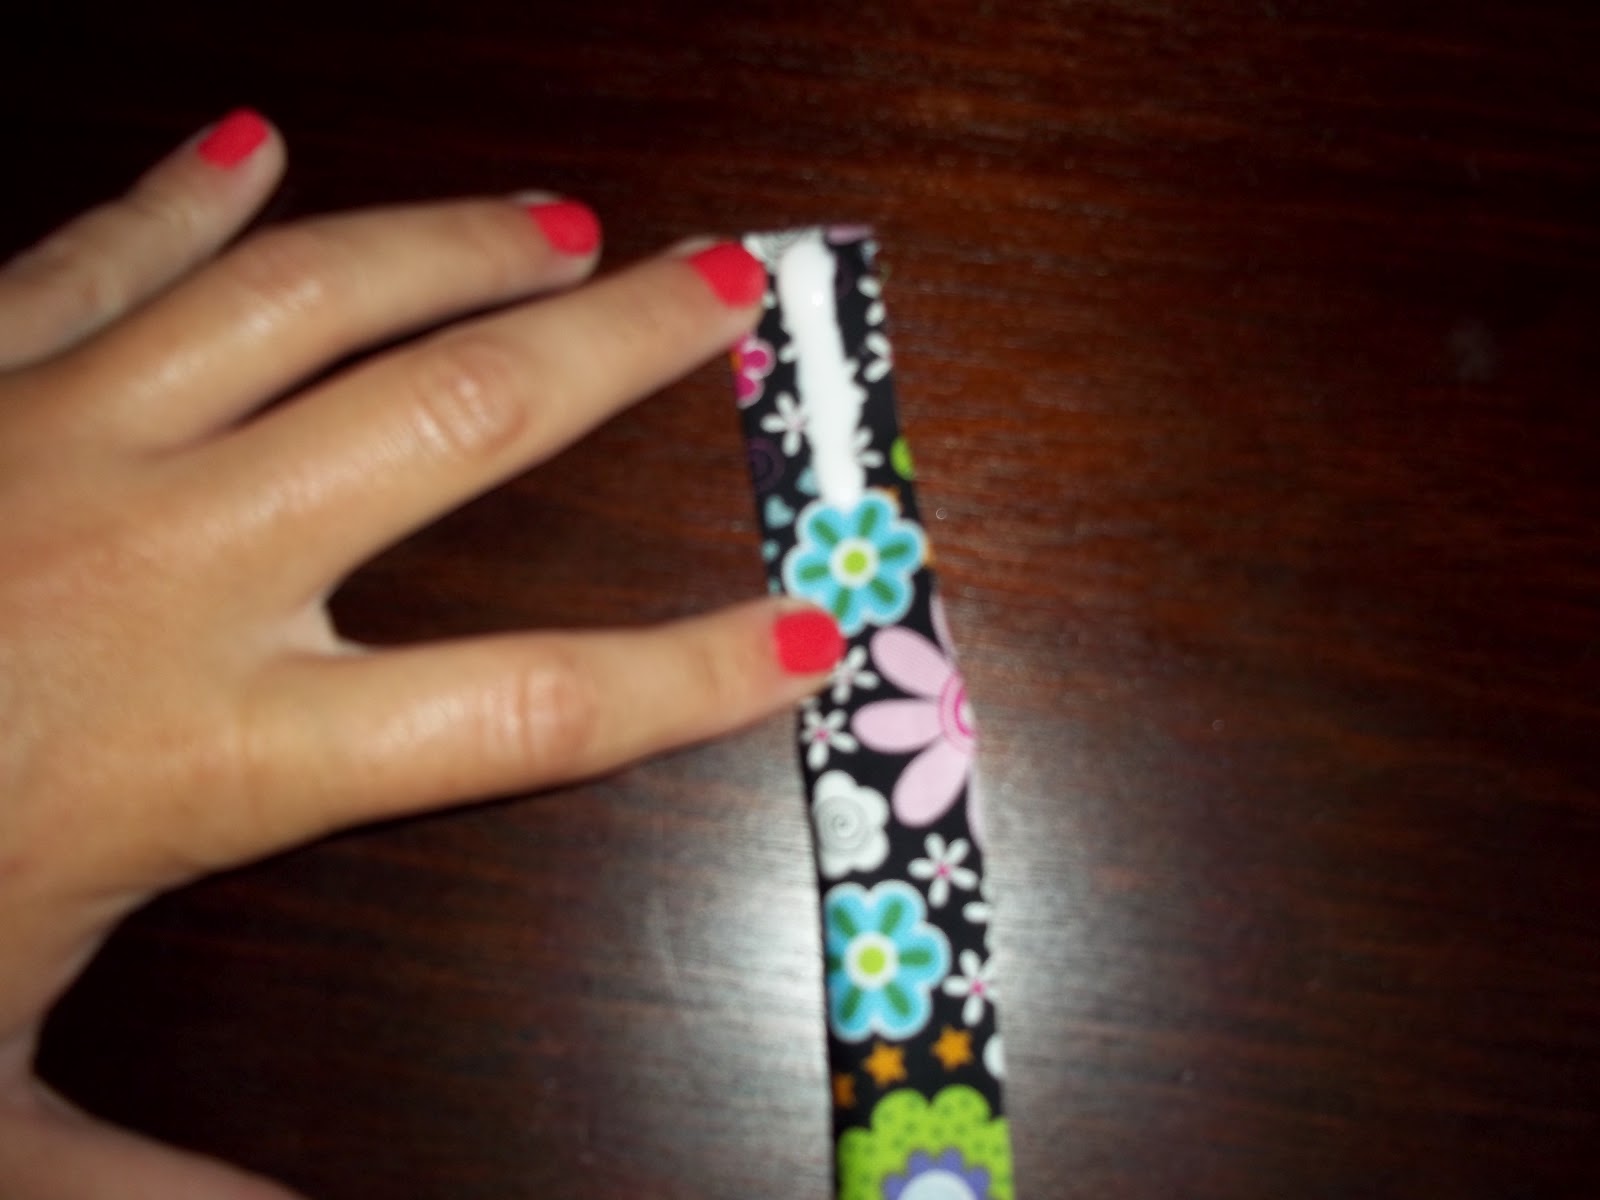
Step Two: Once the fabric strips are cut, begin by folding your strip in half (lengthwise) and applying about a  line of fabric glue top to bottom.  
Step Three
Step Three: Begin rolling your fabric strip about 7 or 8 times.  This will be the center of the flower.  


Step Four 
Step Four: Keep a tight hold on the center with one hand and with your other hand start twisting the fabric around the center in a counter clock-wise direction, placing a small dot of glue every other twist to secure. I usually place a good amount of glue on a piece of cardboard ahead of time and use my finger tip to apply the glue while twisting. The more you twist the fabric, the tighter rolled the flower will be.  


Step Five 
Step Five: Keep twisting your fabric strip around the center and when you get to the end of the strip, glue the end down to the side of the flower.  If you want to make a larger flower, take an additional strip of fabric, fold in half (lengthwise), apply a dot of glue and continue twisting. The more strips added on, the larger the flower.

The flower in this picture was made using two 22" strips of fabric.


Step Six 
Step Six: After the glue on your flowers are dry, use fabric glue or a hot glue gun to attach as desired.  I used my hot glue gun to attach the fabric flowers, one at a time to the headbands.  I glued three flowers per headband.


Rolled Fabric Flowers 
It took me a few evenings to make enough flowers for the headbands. Once you get into the groove of twisting and gluing, you will be surprised just how simple and fun these flowers are to make:)

Headbands:) 
 As a finishing touch, I placed the flower headbands in clear cello bags tied with white tulle.  I wanted to be sure the headbands didn't get smashed when wrapped with the matching pink ruffle tops and comfy boot cut jeans I purchased for the girls. The headbands are darling and  I will try to snap a photo of the girls wearing them at their birthday party.


I am kind of on a roll with making the rolled fabric flowers and like I said before, once you get moving and grooving with making them the possibilities are endless!   My cousin Taylor's birthday party is also coming up and I had some extra fabric quarters in my craft box so I decided to make her a headband to match the outfit I bought her.  Taylor is going into the second grade so I decided to get a little thicker headband and I discovered that is much easier to mount the rolled flowers onto a thicker surface.  

Pink fabric flowers on a thicker headband

Rolled Fabric Flowers 
By the way, I forgot to mention before that the color of the fabric is much more important than the pattern.  Once the flowers are rolled the pattern isn't really visible, just the colors.  The fabric that I used to create the flowers for this headband had a bright pink background with large green, yellow and orange flowers. 


Flower Headband:) 

All of the flower headbands I made are adorably cute, but I do think the bright pink flowers on the thicker pink headband is my favorite! I am excited  to see what else I can beautify with these crafty treasures! 


Fabric Flower Hair Pins


Lauren 

Sunday, July 22, 2012

www.groundedwife.blogspot.com

The Grounded Wife in
her DIY Cardigan
This past Winter, one of my dearest friends, Dayna and I decided to start a "crafty club". Currently, Dayna and I are the only members of this crafting club (our other friends weren't too hip to the idea) but in theory it's a fun way for us to spend some quality time together and a great way to let our creativity shine!

Dayna is the writer of a fabulous blog (
www.groundedwife.blogspot.com) where she features delicious recipes, handy dandy tips and tricks, organizational and upcycling ideas and crafty projects. Dayna is one of the most ambitious and creative people I know! I highly recommend you check out the Grounded Wife so you can see for yourself just how crafty and resourceful Dayna truly is! Dayna is my inspiration for writing my blog and hopefully I will soon have many more posts that feature our crafty club activities:)

The Grounded Wife is expecting a little Crabb in November and has been working diligently to decorate the nursery and to create a warm and comfy nest for her baby bundle. I am so excited for the arrival of baby Crabb and I can only image how amazingly special her nursery will be:)
Lauren

Monday, July 16, 2012

Fabric Wreath Tutorial

Baby Bash Giraffe Wreath 

My dear friend, Erin is expecting her first baby bundle in November and a few girlfriends and I have been planning a baby shower in her honor.  Erin loves giraffes and has chosen an adorable neutral giraffe theme for her baby's nursery Snickerdoodle Bedding.

While planning for Erin's baby bash, we decided to incorporate her giraffe nursery theme into the party decor, games and favors.  Since one of my favorite craft projects are wreaths, my fellow party planner presented me with the challenge of making a wreath that will not only greet guests as they arrive for the shower but can also be enjoyed in the baby's nursery. This cute idea was right up my alley!  

Eager to get started, I ventured out to several fabric stores on search for the perfect neutral fabrics that would coordinate with the colors of Erin's nursery (tan,cocoa, yellow and pale orange).  There were so many  fabrics to choose from that I was sure I would find what I was looking for...how hard could it be?!  Sadly mistaken, I was in over my head! Although I found many baby friendly giraffe theme fabrics, I couldn't find any in neutral colors.  Frustrated, I surrendered my search and was even considering buying an extra crib sheet from the bedding collection and cutting it up into strips so the wreath would coordinate perfectly...great idea but kinda costly.  I decided to make do with the fabrics I could find and I did eventually find a neutral fabric with baby carriages and blocks to substitute and wooden giraffes that I could paint to coordinate as a bonus:) I was back on track! 

Supplies: 
  • 14 inch wreath (I used a straw wreath with the plastic left on to minimize the mess) 
  • 4 to 5 different fabrics (1/2 yard of each) 
  • Pinking Shears or craft scissors (pinking shears are scissors with blades that are saw-toothed instead of straight and cut a zigzag pattern instead of a straight edge) 
  • Ruler or measuring tape 
  • Accents (I used wooden giraffes and painted them to match using acrylic paint and Mod Podge and attached them using a glue gun but fabric glue would probably work too) 
  • Bonus: I recently purchased a  Fiskars Rotary Cutting Set  which made measuring and cutting the fabric strips a lot easier! It's well-worth the investment. 
Supplies: rotary cutter, board, ruler, pinking shears, and fabrics

Step One: Cut the fabric pieces into 2" wide by 18" inch long strips by placing the fabric flat along the mat, then placing the ruler on top to measure the width and guiding the rotary cutter along the edge of the ruler from one end of the ruler to the other.   
Step One: cut fabric into 2" by 18" strips
Step Two: Once all of the fabric is cut into strips, use the pinking shears (optional) to cut a zigzag pattern along the edges of each of the strips of fabric.
Step Two: cut zigzag pattern along edges of fabric strips
Step Three: Tie the fabric strips onto the wreath clockwise alternating colors (I used a 1-2-3-4-5 pattern for variety). Make sure to tie a double knot to keep the fabric pieces in place.
Step Three: tie fabric strips onto wreath clockwise

A"giraffe" touch...
The wooden giraffes I found at the craft store were originally painted orange and yellow so I decided to repaint them to match using acrylic paint and a thin paint brush.  I had to apply three layers of paint, allowing time to fully dry between layers.  Once painted to my liking, I painted a thin layer of Mod Podge to each of the giraffes to add a shiny glow.  I laid them on wax paper to protect the table top and to prevent the giraffes from sticking.  Once dry, I used a hot glue gun to attach each of the giraffes onto the wreath.  

Giraffes (Before)
Giraffes (After)

I had a lot of fun with this project and I am excited with how cute the wreath turned out!  I hope it will be a special surprise for Erin and I am sure it will be the perfect addition to her little giraffe's already adorable nursery!

Lauren